
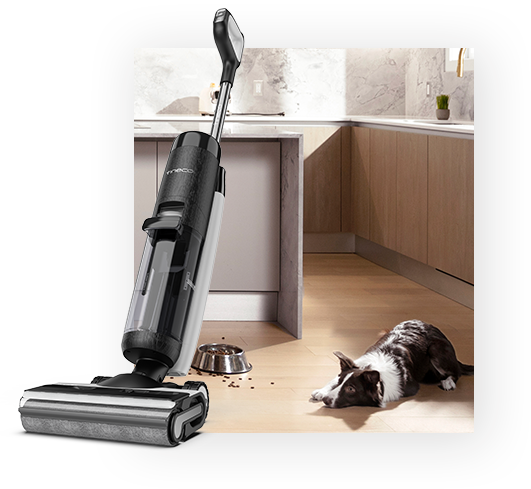
Dealing with a Tineco iFloor 3 not charging can be incredibly frustrating, especially when you’re in the middle of cleaning and your trusty cordless wet/dry vacuum suddenly decides to play dead. Whether it’s refusing to power up on the dock or the battery light just won’t turn green, this issue disrupts your routine and leaves you with a messy floor. The good news? A simple quick fix like checking the charging contacts for dirt buildup often resolves it in under 5 minutes, getting you back to spotless floors without much hassle.
In this comprehensive guide, we’ll go beyond that initial troubleshooting to explore the most common causes of your Tineco iFloor 3 not charging, provide step-by-step solutions ranging from DIY basics to more advanced checks, and share prevention tips to keep this problem from recurring. By the end, you’ll have the confidence and tools to diagnose and fix the issue yourself, saving time and money while extending the life of your vacuum. Let’s dive in and get your Tineco iFloor 3 charging reliably again.
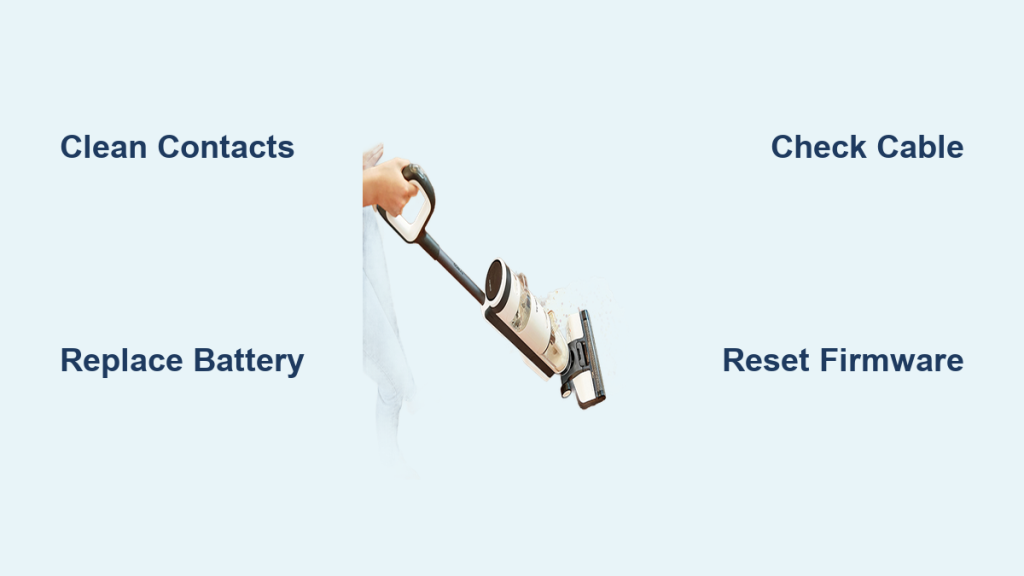
Common Causes of Tineco iFloor 3 Not Charging
Understanding why your Tineco iFloor 3 not charging is happening is the first step to a lasting fix. This model, known for its powerful suction and easy mopping, relies on a lithium-ion battery and a docking station for recharging. But like any cordless vacuum, it’s prone to a few typical glitches. Below, we’ll break down the most frequent culprits with clear explanations so you can pinpoint the problem quickly.
Dirty Charging Contacts or Dock
One of the top reasons for Tineco iFloor 3 not charging is buildup on the charging pins or dock. Residue from wet cleaning sessions—think dried soap, hair, or dust—can create a barrier that prevents proper electrical connection. This is especially common if you use the vacuum for sticky spills or in high-traffic areas. If the contacts look tarnished or the dock feels sticky, this is likely your issue.
Faulty or Worn-Out Battery
The Tineco iFloor 3’s battery is designed to last up to 20-30 minutes per charge, but over time (typically after 1-2 years of regular use), it can degrade. Swelling, overheating during past charges, or simply age can cause it to fail to hold a charge. If your vacuum powers on briefly but dies quickly, or if the battery indicator shows erratic lights, this could be the root cause.
Loose or Damaged Charging Cable
A frayed power cord, bent connector, or loose internal wiring in the dock can interrupt the charging flow. The Tineco iFloor 3 uses a standard barrel connector, and if it’s been tugged or exposed to moisture, it might not make solid contact. This is a sneaky issue because the vacuum might seem fine otherwise.
Overheating or Safety Shutdown
Built-in safety features on the Tineco iFloor 3 will halt charging if the unit or battery gets too hot, often due to prolonged use in warm environments or a blocked vent. If you’ve been vacuuming in a stuffy room or the dock is in direct sunlight, the system might shut down to prevent damage, mimicking a “not charging” problem.
Firmware or Sensor Glitches
Less common but possible, outdated firmware or a malfunctioning charge sensor can confuse the vacuum’s smart system. The iFloor 3 has iLoop sensors for self-adjusting power, and if they’re dirty or glitched, they might prevent charging initiation. This usually shows as no response at all when docked.
How to Fix Tineco iFloor 3 Not Charging
Now that you’ve identified potential causes, let’s tackle the fixes. We’ll start with the simplest methods and progress to more involved ones. Each approach includes estimated time, tools needed, and what to do if it doesn’t work. Always unplug the dock before starting any cleaning or inspection to avoid shocks—safety first!
Method 1: Clean the Charging Contacts and Dock (Quickest Fix, 5-10 Minutes)
This is the go-to solution for most Tineco iFloor 3 not charging cases, as dirt is the number one offender.
Diagnosing the Issue
Inspect the gold-colored pins on the bottom of your vacuum and the corresponding slots in the dock. Look for any visible grime, corrosion, or debris. If the LED light on the dock doesn’t illuminate when plugged in, or if the vacuum’s battery icon blinks red without charging, proceed.
Step-by-Step Fix
- Unplug and Prepare: Disconnect the dock from the wall outlet. Remove the vacuum from the dock and wipe the exterior with a soft, dry cloth to avoid spreading dirt.
- Clean the Vacuum Pins: Use a cotton swab dipped in isopropyl alcohol (70% or higher) to gently rub the charging contacts. Avoid excessive liquid— just enough to dampen the swab. Let it air dry for 1-2 minutes.
- Clean the Dock: With a dry toothbrush or compressed air, remove debris from the dock’s slots. If needed, use a microfiber cloth with a tiny bit of alcohol for stubborn spots.
- Reassemble and Test: Plug the dock back in, place the vacuum on it firmly (ensure it clicks into place), and wait 5 minutes. The charging light should turn solid blue or green. Run a short cleaning cycle to confirm.
If it still doesn’t charge, the contacts might be damaged—move to Method 2. This fix resolves about 60% of charging issues, per user reports on Tineco forums.
Method 2: Check and Replace the Battery (15-20 Minutes)
If cleaning doesn’t help, the battery might be the culprit. Tineco batteries are user-replaceable, making this a straightforward DIY.
Diagnosing the Issue
Remove the battery (located at the base—press the release tabs). Check for swelling, leaks, or if it feels unusually hot/cold. Test by plugging directly into a compatible charger if you have one; no response means it’s faulty.
Step-by-Step Fix
- Power Down: Turn off the vacuum and remove it from the dock.
- Remove the Old Battery: Flip the unit over, slide the battery latch, and pull it out. Note the model number (usually ST-0100 or similar for iFloor 3).
- Inspect and Clean: Wipe the battery compartment with a dry cloth. If replacing, order a genuine Tineco replacement (around $50-70 on Amazon or the official site).
- Install the New Battery: Align the tabs, slide it in until it locks, and dock the vacuum. Charge for 4-6 hours initially.
- Test: Monitor the charge level via the app or LED—it should reach 100% without issues.
Warning: Dispose of old lithium-ion batteries at a recycling center; don’t throw them in the trash to prevent fire risks. If the new battery fails too, the issue might be the dock—try Method 3.
Method 3: Inspect and Repair the Charging Cable (10-15 Minutes)
A damaged cable is easy to overlook but simple to address.
Diagnosing the Issue
Examine the cord for frays, kinks, or exposed wires. Plug it into another outlet or device (if compatible) to test power flow. If the dock light flickers, the cable is suspect.
Step-by-Step Fix
- Unplug Everything: Safety check—ensure nothing is connected.
- Visual Inspection: Trace the entire cable from wall plug to dock. Feel for soft spots indicating internal damage.
- Clean Connectors: Use alcohol wipes on the barrel plug and dock input.
- Replace if Needed: Tineco cables cost $20-30; swap it out by unplugging both ends and connecting the new one.
- Test Charge: Dock the vacuum and observe for 10 minutes. If stable, you’re good.
For advanced users, if you’re handy with a multimeter, test continuity (should read near 0 ohms). If repair isn’t your thing, skip to professional help.
Method 4: Reset and Update Firmware (Advanced, 20-30 Minutes)
Sensor or software glitches can mimic charging failures.
Diagnosing the Issue
If the vacuum responds to manual buttons but not docking, or if lights are erratic, reset might clear it.
Step-by-Step Fix
- Hard Reset: Press and hold the power button for 10 seconds while off the dock. The lights should flash, indicating reset.
- Firmware Check: Download the Tineco Life app (iOS/Android), connect via Bluetooth, and check for updates. Follow on-screen prompts to install.
- Dock and Charge: Place on the dock post-update and let it sit for 30 minutes.
- Test Thoroughly: Run a full charge cycle and a cleaning test.
If overheating was the trigger, ensure the dock is in a cool, ventilated spot. This method works for about 20% of persistent cases.
Prevention Tips for Tineco iFloor 3 Charging Issues
To avoid future Tineco iFloor 3 not charging headaches, proactive maintenance is key. Here’s how to keep things running smoothly:
- Regular Cleaning: Wipe the dock and contacts weekly with a dry cloth, especially after wet mopping sessions. This prevents 80% of buildup-related problems.
- Battery Care: Charge immediately after use, but avoid full discharges. Store at 50-70% charge if not using for weeks—lithium batteries hate extremes.
- Environmental Control: Keep the dock away from heat sources, moisture, or direct sun. Ideal room temp: 50-95°F (10-35°C).
- Cable Management: Coil the cord loosely and avoid pulling it from the wall. Inspect monthly for wear.
- Usage Limits: Don’t exceed 30-minute sessions without cooling breaks to prevent thermal shutdowns.
- App Monitoring: Use the Tineco app to track battery health and get alerts for low performance.
Following these, you can extend your iFloor 3’s battery life by 20-30%, based on manufacturer guidelines.
Pro Tips for Tineco iFloor 3 Owners
Go beyond the basics with these expert insights to optimize your vacuum and sidestep common pitfalls:
- Quick Charge Boost: If you’re in a rush, a 10-minute charge gives about 5-10 minutes of runtime—perfect for spot cleans.
- Avoid Common Mistakes: Never charge on a soft surface like carpet; it blocks vents and causes overheating. Also, don’t use third-party batteries—they can damage the system.
- Optimize Performance: Clean the roller brush and filters monthly to reduce strain on the battery, indirectly improving charge efficiency.
- Storage Hack: For long-term storage, charge to 50% and store in a cool, dry place. Check every 3 months.
- Eco Tip: Unplug the dock when not in use to save energy and reduce wear on the power supply.
- App Integration: Enable notifications in the Tineco app for charging status—it can alert you to issues before they escalate.
- Upgrade Consideration: If your iFloor 3 is over 2 years old, consider the iFloor 3 Breeze model for better battery tech.
These tweaks can make your cleaning routine more efficient and reliable.
When to Call Professional Help
While most Tineco iFloor 3 not charging issues are DIY-friendly, some signs scream for expert intervention:
- Persistent failure after trying all methods, especially if the vacuum smells burnt or the battery swells (fire hazard—stop using immediately).
- Water damage from improper cleaning, which might corrode internals.
- Warranty-covered defects: If under 2 years, contact Tineco support (1-855-285-1081 or their website) for free repair/replacement.
Look for certified technicians via Tineco’s authorized service locator. Expect costs of $50-150 for out-of-warranty fixes, depending on parts. Always verify warranty status first—genuine repairs preserve coverage.
FAQ
Q: Why is my Tineco iFloor 3 blinking red when charging?
A: A blinking red light usually indicates a charging error, like poor contact or overheating. Clean the pins first, ensure the dock is stable, and let it cool for 15 minutes. If it persists, reset the unit or check the battery health via the app. This is often fixed without tools.
Q: How long should a full charge take for the Tineco iFloor 3?
A: Expect 4-6 hours for a full charge from empty, providing up to 35 minutes of runtime. If it’s taking longer than 8 hours, the cable or dock might be faulty—test with a replacement.
Q: Can I charge the Tineco iFloor 3 without the dock?
A: No, it’s dock-only for safety and efficiency. Direct battery charging isn’t supported and could void the warranty. Stick to the official dock for best results.
Q: What if the charging light doesn’t come on at all?
A: Start by verifying the outlet works (plug in a lamp). Then, clean contacts and try a reset. If nothing, the power supply in the dock may need replacement—contact Tineco for a $30 part.
Q: Is it safe to use the vacuum while charging?
A: Absolutely not—the Tineco iFloor 3 isn’t designed for that. It could overheat or cause electrical issues. Always charge fully off the unit.
Q: How do I know if my battery needs replacing?
A: Signs include shorter runtime (under 20 minutes), failure to hold charge overnight, or physical damage. Tineco recommends replacement every 300-500 cycles; track via the app.
Q: Does using tap water in the tank affect charging?
A: Indirectly, yes—hard water minerals can build up on contacts over time. Use distilled or filtered water for cleaning to minimize residue and prevent charging glitches.
Q: Can a power surge cause charging problems?
A: Yes, surges can fry the dock’s internals. Use a surge protector (under $10) for the charging setup to safeguard against this.
Alternative Solutions for Persistent Charging Issues
If standard fixes fail, consider these alternatives to get back to cleaning without buying a new vacuum right away:
| Solution | Pros | Cons | Best For |
|---|---|---|---|
| Third-Party Charging Dock | Affordable ($20-40), compatible with iFloor 3 pins | May not integrate with app; quality varies | Budget users needing a quick dock swap |
| Battery Reconditioning Service | Revives old batteries for $20-30; eco-friendly | Not always reliable; shipping required | Those avoiding full replacement |
| Universal Cordless Vacuum Charger Adapter | Works with multiple brands; versatile | Risk of incompatibility or warranty void | Multi-device households |
| Upgrade to Tineco iFloor 5 | Smarter sensors, longer battery life (40+ min) | Higher cost ($200+); overkill for minor issues | Frequent users wanting future-proofing |
Weigh pros/cons based on your needs—stick to reputable sellers like Amazon for compatibility.
Get Your Tineco iFloor 3 Charging Again
You’ve now got a full toolkit to conquer Tineco iFloor 3 not charging woes:
- Quick cleans for dirty contacts
- Battery swaps and cable checks for hardware fixes
- Resets and prevention for long-term reliability
- Pro tips and alternatives for optimization
Don’t let a charging hiccup derail your cleaning game—start with the simplest method today, and your iFloor 3 will be back to powerful, mess-free performance in no time. Following this guide not only saves you from frustration but also keeps your home spotless effortlessly.
Fixed your Tineco yet? Drop your success story or lingering questions in the comments below—we’re here to help!