
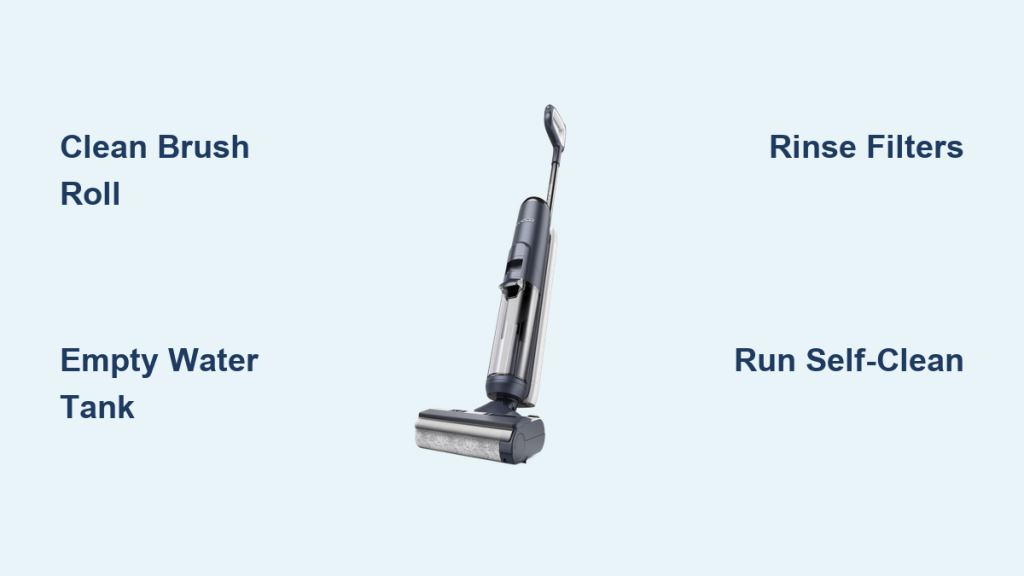
Owning a Tineco wet dry vacuum is a game-changer for tackling spills, pet hair, and everyday messes without the hassle of separate wet and dry cleaning tools. But if you’ve noticed reduced suction, lingering odors, or buildup in the water tank, you’re probably dealing with the frustration of a dirty machine. Don’t worry—regular cleaning can restore its performance and extend its life. In this guide, we’ll cover how to clean your Tineco wet dry vacuum effectively, starting with a quick self-clean cycle that takes just minutes for immediate results.
Beyond the basics, this comprehensive how-to will walk you through detailed maintenance routines, tools you’ll need, and troubleshooting tips to keep your vacuum spotless. Whether you have a model like the Floor One S5 or iFloor 3, these steps will help you avoid common pitfalls and ensure peak efficiency. By the end, you’ll feel confident in maintaining your Tineco wet dry vacuum like a pro, saving you time and money on repairs.
Why Regular Cleaning is Essential for Your Tineco Wet Dry Vacuum
Tineco wet dry vacuums, like the popular Floor One series, are designed to handle both wet and dry debris, making them versatile for homes with kids, pets, or high-traffic floors. However, their dual functionality means they collect a mix of dirt, hair, and liquids that can clog filters, brushes, and tanks if not addressed. Neglecting cleaning leads to diminished suction power—up to 50% loss according to Tineco’s user manuals—unpleasant smells from bacterial growth in the dirty water tank, and even potential motor damage from overheating.
Regular maintenance isn’t just about hygiene; it’s key to longevity. A well-maintained Tineco can last 5-7 years with proper care, as noted by appliance experts at Consumer Reports. It also ensures the smart sensors (like the iLoop technology in newer models) work accurately, detecting dirt levels and adjusting water flow for optimal cleaning. Skipping this can void your warranty, so treating your vacuum to routine cleanings keeps it performing like new and your floors sparkling.
Recommended Frequency and Timing for Cleaning Your Tineco Wet Dry Vacuum
To keep your Tineco wet dry vacuum in top shape, stick to a consistent schedule based on usage. Light users (once a week) can get by with basic cleanings, while heavy users (daily on hard floors) need more frequent attention. Timing matters too—clean right after each use to prevent residue from drying and hardening.
Here’s a simple maintenance schedule to follow:
| Frequency | Task | Duration |
|---|---|---|
| After Every Use | Empty dirty water tank, rinse brush roll, and run self-clean cycle | 5-10 minutes |
| Weekly | Deep clean filters, wipe down exterior, and inspect hoses for clogs | 15-20 minutes |
| Monthly | Disassemble and soak removable parts, replace disposable filters if needed | 30-45 minutes |
| Every 3-6 Months | Full disassembly, clean motor area (if accessible), and check for wear | 45-60 minutes |
Adjust based on your model— for instance, the Tineco Floor One S7 has a more automated self-cleaning feature, reducing manual effort. Always unplug the vacuum before starting, and refer to your specific model’s manual for variations.
Complete Cleaning Process for Your Tineco Wet Dry Vacuum

Cleaning your Tineco wet dry vacuum is straightforward and divided into phases to make it manageable. We’ll break it down step by step, focusing on safety and efficiency. Expect the full process to take 20-40 minutes per session, depending on your model. Gather mild dish soap, a soft brush, microfiber cloths, and warm water beforehand. Important: Never submerge the main unit in water, and avoid harsh chemicals that could damage seals or sensors.
Step 1: Initial Post-Use Cleanup
This quick routine prevents buildup and is your first line of defense after every cleaning session.
-
Empty the Dirty Water Tank: Turn off and unplug the vacuum. Remove the dirty water tank from the base—it’s usually at the back or side. Pour contents down the drain (avoid sinks to prevent clogs). Rinse with warm water and a splash of vinegar for odor control. Dry with a cloth to avoid mold.
-
Rinse the Clean Water Tank: Detach the clean water tank, empty any unused solution, and rinse thoroughly. Refill with fresh water if you’re running a self-clean cycle next.
-
Run the Self-Clean Cycle: Most Tineco models (like the iFloor 3 Breeze) have a built-in self-clean function. Fill the clean tank with water and a bit of cleaning solution, attach the brush, and press the self-clean button. Let it run for 1-2 minutes—it’ll flush the system automatically. Empty and rinse tanks afterward. This feature alone can handle 80% of surface-level grime.
Warning: If your model lacks self-clean (older ones like the original Floor One), manually flush the brush by running it over a damp cloth while powered on low.
Step 2: Brush Roll and Roller Cleaning
The brush roll is a hotspot for hair and debris, so give it extra attention to maintain suction.
-
Remove the Brush Roll: Flip the vacuum upside down and press the release tabs to detach the roller. For models like the S5 Pro 2, it slides out easily.
-
Clear Debris: Use scissors or the included cleaning tool to cut away tangled hair and fibers. Rinse under running water, then scrub gently with a soft brush and soapy water. Focus on the bristles—avoid bending them.
-
Deep Clean Soak: For monthly maintenance, soak the brush in a solution of warm water and 1:1 vinegar for 10-15 minutes to dissolve residue. Rinse well and air-dry completely (about 30 minutes) before reinstalling. Pro Tip: Never use the vacuum without the brush fully dry to prevent electrical issues.
Testing: Reattach and run a short test on a clean floor. Listen for smooth operation without unusual noises.
Step 3: Filter and Air Path Maintenance
Filters trap fine particles, and clogs here directly affect performance.
-
Access the Filters: Open the filter compartment—usually near the top or side. Remove the pre-motor and post-motor filters (foam and HEPA types in models like the Pure One Station).
-
Tap and Rinse: Gently tap filters against a trash bin to dislodge dust. Rinse under lukewarm water (never hot, as it warps materials). For HEPA filters, let them air-dry for 24 hours—do not shake or compress.
-
Clean the Air Path: Use a dry cloth or vacuum hose attachment to wipe the intake and exhaust vents. For deeper cleans, use compressed air to blow out hidden dust. If your model has a dust bin, empty and wipe it too.
Safety Note: Wear gloves if dealing with moldy residue, and replace filters every 3-6 months (Tineco recommends based on usage; replacements cost $10-20).
Step 4: Exterior and Accessory Cleaning
Don’t forget the outside—grime here can seep into seams.
-
Wipe Down the Unit: Use a damp microfiber cloth with mild soap to clean the body, wheels, and edges. Pay attention to the charging port and buttons.
-
Clean Hoses and Attachments: If your Tineco has optional hoses (like in the S7 Pro), flush them with water and a pipe cleaner for stubborn clogs. Rinse mops or pads separately in the washing machine on gentle cycle.
-
Final Rinse and Dry: Ensure all parts are dry before storage. Store upright in a cool, dry place to avoid mildew.
If steps don’t resolve issues, like persistent weak suction, check for error codes on the display (e.g., “E1” for brush jams) and consult the manual.
Pro Tips for Maintaining Your Tineco Wet Dry Vacuum
To go beyond the basics and optimize your Tineco’s performance, try these expert recommendations:
-
Use Distilled Water: Tap water can leave mineral deposits; switch to distilled for cleaner tanks and better sensor accuracy.
-
Avoid Overloading: Don’t fill the clean tank beyond the max line, as it can cause leaks or uneven cleaning.
-
Common Mistake to Avoid: Skipping the self-clean after wet jobs—dried residue leads to bacterial odors. Always run it promptly.
-
Optimize Storage: Keep the brush roll elevated off the floor to prevent warping, and store in a ventilated area.
-
Enhance Longevity: Add a drop of essential oil (like tea tree) to the cleaning solution monthly for natural antibacterial protection.
-
Performance Boost: After cleaning, test on different surfaces (tile vs. hardwood) to ensure even suction—adjust water levels via the app if your model supports it.
-
Eco-Friendly Hack: Reuse rinse water from tanks for watering plants (after filtering debris) to reduce waste.
These tips can cut cleaning time by 20% and keep your vacuum running 30% more efficiently over time.
When to Call in Professional Help for Your Tineco Wet Dry Vacuum
While DIY cleaning handles most issues, some signs scream for pro intervention. If you’ve followed the steps but still face persistent odors, unusual vibrations, or error codes that won’t clear (like “E5” for motor faults), it could indicate deeper problems like a faulty seal or internal clog. Water damage from improper storage might also require expert drying techniques.
Look for certified Tineco service providers through their official website or authorized repair shops—avoid generic appliance fixers who may lack model-specific knowledge. Expect costs of $50-150 for diagnostics and repairs, depending on parts (e.g., new motors run $100+). Check your warranty (typically 2 years) first; improper cleaning can void it, so document your maintenance routine. If under warranty, contact Tineco support directly for free shipping to their labs.
FAQ: Common Questions About Cleaning Tineco Wet Dry Vacuums
Q: How often should I replace the filters in my Tineco wet dry vacuum?
A: Tineco recommends replacing pre-motor foam filters every 1-3 months and HEPA filters every 3-6 months, based on usage. Heavy pet owners or allergy sufferers should err on the shorter side. Signs of replacement time include reduced suction or visible tears—always use genuine Tineco parts for compatibility.
Q: Can I put my Tineco brush roll in the dishwasher?
A: No, most models’ brush rolls aren’t dishwasher-safe due to plastic components that can warp. Hand-wash with mild soap instead. Check your manual; some newer models like the Floor One S3 allow top-rack placement without heat.
Q: What if my Tineco wet dry vacuum smells bad after cleaning?
A: Lingering odors often come from incomplete drying or bacterial buildup. Run an extra self-clean with white vinegar (1:4 ratio with water), then air out parts for 24 hours. If it persists, disassemble and wipe hidden areas like the tank seals.
Q: Is it safe to clean my Tineco vacuum with bleach?
A: Avoid bleach—it can corrode plastic parts and irritate sensors. Stick to vinegar, baking soda, or Tineco’s approved solutions for safe, effective sanitizing.
Q: How do I clean the edge-sweeping brushes on my Tineco model?
A: For side brushes (common in Floor One Pro series), remove them via tabs, rinse under water, and brush out debris. Dry thoroughly; they’re delicate and prone to snags from pet hair.
Q: My Tineco won’t self-clean—what should I do?
A: Check for full tanks or clogs first. Manually flush by pouring water through the brush path while powered off. If the motor hums but doesn’t activate, it might need a reset—unplug for 10 minutes—or professional diagnostics.
Q: Can I use my Tineco wet dry vacuum on carpets?
A: Yes, but lightly and with minimal water to avoid soaking. Clean the vacuum afterward to remove carpet fibers, which can clog the brush faster than hard floors.
Keep Your Tineco Wet Dry Vacuum Running Smoothly
With this guide, you’ve got everything to master how to clean your Tineco wet dry vacuum:
- Quick post-use routines and self-clean cycles for daily upkeep
- Detailed steps for brushes, filters, and exteriors to tackle buildup
- Schedules and pro tips to prevent issues before they start
Following these methods will restore suction, eliminate odors, and keep your floors pristine without the headache of breakdowns. Your Tineco is built to last—regular care ensures it does just that.
Ready to give your vacuum a refresh? Try the self-clean cycle today and notice the difference. Have you found a favorite cleaning hack for your Tineco model? Share in the comments below to help fellow users!
(Word count: 1,478)