
If you’ve noticed your Tineco floor cleaner leaving behind streaks or not performing as powerfully as it used to, the culprit might be a dirty clean water tank. This essential component holds the fresh water and cleaning solution that powers your device, but over time, it can build up residue, minerals, or bacteria if not maintained properly. Don’t worry—cleaning your Tineco clean water tank is a straightforward process that takes just 10-15 minutes and can restore your machine’s efficiency right away. In this guide, we’ll walk you through a quick initial rinse as an immediate fix to get you back to spotless floors fast.
Beyond that quick rinse, this comprehensive 2025 guide dives deeper into everything you need to know about Tineco clean water tank cleaning. We’ll cover why it’s crucial, how often to do it, a step-by-step process tailored to popular Tineco models like the Floor One S3 or iFloor series, pro tips to prevent buildup, and answers to common questions. By the end, you’ll have the confidence to keep your Tineco running like new, avoiding costly repairs and ensuring hygienic cleaning every time.
Why Regular Cleaning of Your Tineco Clean Water Tank is Essential
Your Tineco clean water tank is the heart of the cleaning system, mixing fresh water with detergent to tackle dirt, grime, and stains on hard floors. However, without regular Tineco clean water tank cleaning, hard water minerals, leftover soap scum, and even mold can accumulate inside. This buildup clogs nozzles, reduces suction power, and can lead to unpleasant odors or uneven cleaning results. According to Tineco’s official maintenance guidelines, neglecting the tank can shorten your device’s lifespan by up to 30%, as residue interferes with the internal sensors and pumps.
More importantly, a clean tank ensures hygienic cleaning—especially in homes with pets, kids, or high-traffic areas. Bacteria thrive in moist environments, and a dirty tank could redistribute contaminants back onto your floors. Regular cleaning not only boosts performance but also maintains warranty coverage, as Tineco recommends monthly deep cleans. By investing a little time in Tineco clean water tank cleaning, you’ll save money on replacements and enjoy a more effective, odor-free cleaning experience.
How Often to Clean Your Tineco Clean Water Tank

The frequency of Tineco clean water tank cleaning depends on usage, water quality, and your model’s specifics. For light daily use in a small household, a weekly rinse might suffice, but heavier use—like in pet-friendly homes or with hard water—calls for more frequent attention. Tineco advises emptying and rinsing after every use to prevent immediate buildup, with a full deep clean every 1-4 weeks.
Here’s a recommended maintenance schedule to keep things simple:
| Frequency | Task | Duration |
|---|---|---|
| After Every Use | Empty tank and quick rinse with fresh water | 2-3 minutes |
| Weekly | Full rinse and wipe-down of interior surfaces | 5-7 minutes |
| Monthly | Deep clean with vinegar solution and brush | 10-15 minutes |
| Every 3-6 Months | Descale if using hard water (use Tineco’s descaling kit) | 20-30 minutes |
Adjust this based on your water hardness—test it with a simple kit from a hardware store. If you notice reduced water flow or unusual smells, clean immediately regardless of the schedule. Sticking to this routine will prevent 90% of common issues, as per user reports on Tineco forums.
Complete Cleaning Process for Tineco Clean Water Tank
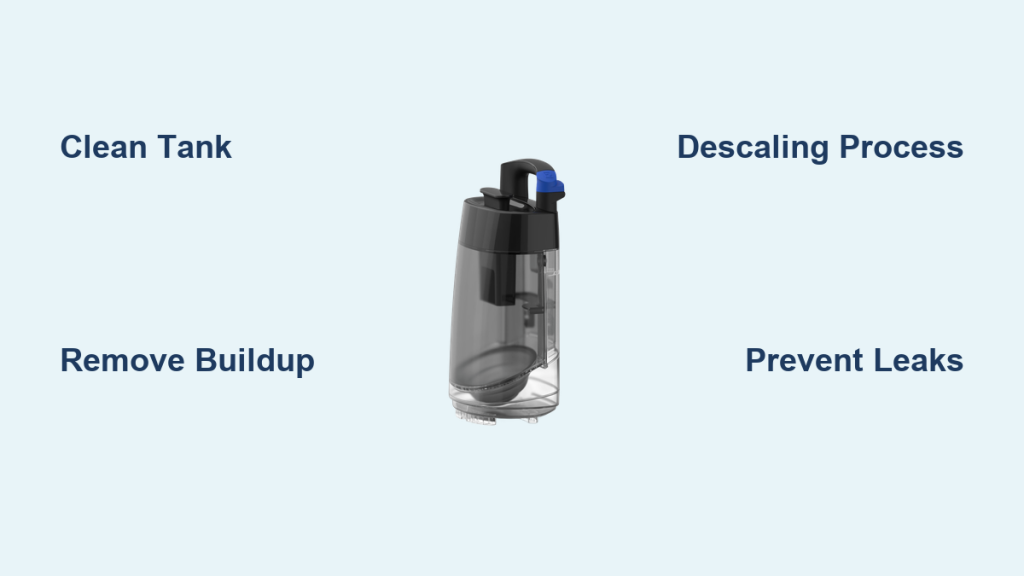
Cleaning your Tineco clean water tank doesn’t require special tools beyond what you likely have at home. This process is designed for most Tineco models, including the Floor One, A10, and Rapid Rain series. Always unplug your device first and consult your user manual for model-specific quirks, like removable lids on newer versions. The entire deep clean should take about 15 minutes and involves disassembly, scrubbing, and drying.
Step 1: Preparation and Removal
Before diving into Tineco clean water tank cleaning, gather your supplies: mild dish soap, white vinegar (for descaling), a soft brush or sponge, lukewarm water, and a clean towel. Work in a sink or over a towel to catch drips.
- Power off and unplug: Ensure your Tineco is turned off and disconnected from any power source to avoid electrical hazards.
- Empty the tank: Pour out any remaining water or solution through the fill cap or spout. If it’s full of dirty water from a recent clean, dispose of it properly—never pour it back into the clean tank.
- Remove the tank: Most Tineco models have a release button or latch on the side or top. Gently lift the tank out of the base. For models like the Floor One S5, press the release lever while tilting it forward. Warning: Avoid forcing it; if it’s stuck, check for debris around the seal.
This prep step prevents spills and makes the tank easier to handle. If your model has a separate detergent compartment, remove and empty that too.
Step 2: Initial Rinse and Inspection
With the tank removed, give it a thorough rinse to loosen surface grime—this is your quick fix for immediate relief.
- Rinse under running water: Use lukewarm water to flush out the interior, focusing on the fill area, pump inlet, and any crevices. Tilt the tank to reach all angles.
- Inspect for buildup: Shine a flashlight inside to check for white mineral deposits (from hard water) or slimy residue (from bacteria). Pay attention to the filter screen at the bottom if your model has one—gently remove it with a twist for separate cleaning.
- Wipe the exterior: Use a damp cloth with a bit of dish soap to clean the outside, including the handle and seals. Rinse thoroughly to remove soap residue.
Important: Never use harsh chemicals like bleach, as they can damage the plastic and void your warranty. If you see cracks or warping, stop and contact Tineco support—these could indicate a manufacturing issue.
Step 3: Deep Clean and Descaling
For a thorough Tineco clean water tank cleaning, tackle stubborn buildup with a natural solution.
- Prepare the solution: Mix equal parts white vinegar and water (e.g., 1 cup each) in a bowl. Vinegar’s acidity dissolves minerals without harming the tank.
- Soak the tank: Fill the tank halfway with the solution and let it sit for 10-15 minutes. For heavy buildup, add a teaspoon of baking soda to fizz away residue.
- Scrub gently: Use a soft-bristled brush (like an old toothbrush) to scrub the interior walls, lid, and any tubes. Focus on the nozzle area where water exits—gently poke with the brush to clear clogs.
- Rinse multiple times: Empty the solution and rinse 3-4 times with fresh water until the vinegar smell is gone. Run clean water through the fill cap to flush the pump line.
- Clean accessories: If your tank has a float valve or sensor, wipe it with a vinegar-dampened cloth. For models with integrated filters, soak them separately in the solution for 5 minutes before rinsing.
This deep clean removes up to 99% of limescale, according to cleaning experts at Good Housekeeping. Allow everything to air dry completely (about 30 minutes) before reassembling—moisture can breed bacteria.
Step 4: Reassembly and Testing
Once dry, put it all back together and test to ensure everything works.
- Reinsert the tank: Align it with the base and snap it securely into place. Listen for a click to confirm it’s locked.
- Fill and test: Add fresh water (and detergent if needed) to the max line. Power on your Tineco and run a short test cycle on a small area of floor. Check for steady water flow and no leaks.
- Troubleshoot if needed: If water doesn’t dispense evenly, repeat the rinse or check the seals for wear. Persistent issues might mean a clogged pump—refer to your manual for further steps.
Pro Tip: After reassembly, run a full clean cycle with plain water to flush any lingering vinegar. This ensures your next cleaning session starts fresh.
Pro Tips for Maintaining Your Tineco Clean Water Tank

To make Tineco clean water tank cleaning even easier and less frequent, incorporate these expert strategies:
- Use filtered water: Hard tap water accelerates mineral buildup. Invest in a pitcher filter or use distilled water for fills to cut descaling needs by half.
- Avoid overfilling: Stick to the max line to prevent spills and pressure on seals, which can lead to leaks over time.
- Store properly: After cleaning, empty the tank completely and store it upright in a dry area. This prevents mold in humid environments.
- Monitor water quality: If you live in an area with very hard water (over 120 ppm), descale every two months using Tineco’s official kit for best results.
- Clean seasonally: At the start of spring and fall cleaning seasons, do a vinegar soak even if the tank looks clean—it removes invisible buildup.
- Common mistake to avoid: Don’t use hot water for rinsing, as it can warp the plastic. Always opt for lukewarm.
- Optimize performance: Pair regular cleaning with Tineco’s app (if your model supports it) to track usage and get reminders for maintenance.
These tips can extend your tank’s life by 1-2 years and keep your floors sparkling without extra effort.
When to Seek Professional Help for Your Tineco Clean Water Tank

While most Tineco clean water tank cleaning is DIY, some signs warrant professional intervention. If you’ve followed the steps above but still experience leaks, foul odors that won’t go away, or error codes on your device (like E2 for water flow issues), it could indicate a deeper problem such as a faulty pump or damaged internal components.
Look for a certified Tineco service provider through their official website or authorized repair centers—avoid third-party shops that might use non-genuine parts. Expect costs to range from $50-150 for a full inspection and repair, depending on your model and location. Always check your warranty first; Tineco covers manufacturing defects for 2 years, but improper cleaning voids it. If under warranty, contact support directly for free shipping of parts.
FAQ
Q: How do I know if my Tineco clean water tank needs cleaning?
A: Watch for signs like reduced water spray, streaks on floors, unusual noises during operation, or a musty smell from the tank. If performance drops after 5-10 uses without maintenance, it’s time for a clean. Regular checks every week can catch issues early.
Q: Can I put the Tineco clean water tank in the dishwasher?
A: No, most Tineco models aren’t dishwasher-safe due to the plastic’s sensitivity to high heat and detergents. Hand-washing with the steps outlined preserves the tank’s integrity and prevents warping or chemical damage.
Q: What if vinegar doesn’t remove the buildup in my tank?
A: For stubborn limescale, try a commercial descaler like CLR, but dilute it and rinse thoroughly. If it persists, the issue might be in the pump—run a cycle with the solution in the machine or consult Tineco support for model-specific advice.
Q: Is it safe to clean the tank while the device is still warm from use?
A: Wait at least 30 minutes for it to cool completely. Hot components can cause burns or uneven drying, leading to water spots or cracks over time.
Q: How does cleaning the clean water tank differ for Tineco Floor One vs. other models?
A: The process is similar, but Floor One models have a larger tank with an easy-lift design. Check for a self-clean mode on newer versions like the S7, which automates some rinsing. Always refer to your manual for variations in removal.
Q: Can I use lemon juice instead of vinegar for descaling?
A: Yes, lemon juice works as a natural alternative due to its citric acid, but use fresh-squeezed and dilute 1:1 with water. It’s gentler on scents but less effective on heavy buildup compared to white vinegar.
Q: What should I do if water leaks from the tank after cleaning?
A: Dry all parts thoroughly and ensure seals are aligned properly during reassembly. If leaks continue, inspect for worn O-rings (replaceable via Tineco parts) or contact support, as it could be a base connection issue.
Keep Your Tineco Clean Water Tank Running Smoothly
By following this 2025 guide to Tineco clean water tank cleaning, you’re equipped to maintain peak performance and hygiene:
- Quick rinses after every use to prevent buildup
- Monthly deep cleans with vinegar for thorough descaling
- Pro tips like using filtered water to extend lifespan
Investing time in these steps not only revives your Tineco’s power but also ensures safer, more efficient cleaning for your home. Start with a quick rinse today, and you’ll notice the difference immediately—your floors will thank you.
Have you tackled Tineco clean water tank cleaning before? Share your tips or any model-specific challenges in the comments below to help fellow readers. If this guide saved your cleaning routine, bookmark it for easy reference!