
If you’ve ever watched your Tineco vacuum mop glide effortlessly across your floors only to notice it’s starting to leave streaks or struggle with pickup, you’re not alone. A dirty Tineco vacuum mop can quickly turn a sparkling clean home into a frustrating chore. The good news? Regular cleaning is straightforward and can restore its peak performance in under 30 minutes. In this guide, we’ll walk you through how to clean your Tineco vacuum mop effectively, starting with a quick daily rinse that tackles the basics.
Beyond the basics, this comprehensive 2025 guide dives deep into why cleaning matters, a full maintenance schedule, step-by-step processes for every component, and pro tips to prevent buildup. Whether you own a popular model like the Floor One S5 or iFloor series, you’ll find tailored advice to keep your device hygienic and efficient. By the end, you’ll have the confidence to maintain your Tineco vacuum mop like a pro, extending its lifespan and saving you money on replacements.
Why Regular Cleaning is Important for Your Tineco Vacuum Mop
Your Tineco vacuum mop is a hybrid wonder—suctioning up dirt while mopping with clean water and detergent. But without proper care, residue from spills, pet hair, and everyday grime can clog the system, leading to reduced suction, uneven mopping, or even mold growth in the tanks. Important: Neglecting cleaning can void your warranty or cause irreversible damage, like a jammed brush roll or burnt-out motor.
Regular maintenance ensures optimal performance by preventing bacterial buildup, which is especially crucial in homes with kids or pets. According to Tineco’s official guidelines, a well-maintained unit can last 3-5 years with daily use. Plus, it keeps your floors truly clean—no one wants to mop with dirty water! By following this how-to clean Tineco vacuum mop routine, you’ll avoid costly repairs and enjoy fresher, more effective cleaning every time.
How Often to Clean Your Tineco Vacuum Mop
Frequency is key to keeping your Tineco vacuum mop in top shape. Light daily use might only need quick rinses, but heavier households (think high-traffic areas or furry friends) demand more attention. Over-cleaning won’t hurt, but under-cleaning leads to odors and inefficiency.
Here’s a recommended maintenance schedule based on Tineco’s recommendations and user experiences from forums like Reddit’s r/Tineco. Adjust based on your usage—aim for at least the minimum to prevent issues.
| Frequency | Task | Duration |
|---|---|---|
| After Every Use | Empty dirty water tank, rinse clean water tank, and run self-clean cycle | 5-10 minutes |
| Weekly | Deep clean brush roll, wipe exterior, and inspect filters | 15-20 minutes |
| Monthly | Full disassembly, descale if using hard water, and replace disposable parts like pads if needed | 20-30 minutes |
| Every 3-6 Months | Check for wear on rollers and seals; professional servicing if odors persist | Varies |
Pro Tip: Set a reminder on your phone tied to cleaning days. For models with app integration like the Floor One S7, use the built-in alerts for timely maintenance.
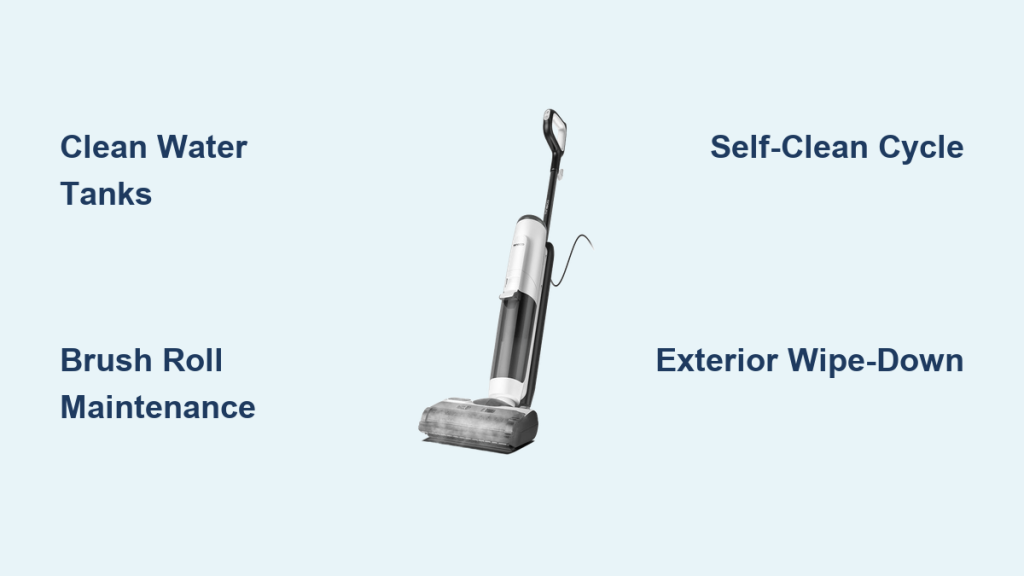
Complete Cleaning Process for Tineco Vacuum Mop
Cleaning your Tineco vacuum mop doesn’t require fancy tools—just warm water, mild dish soap (Tineco recommends their own solution to avoid damaging sensors), and a soft cloth. Always unplug the device first for safety. We’ll break this into major steps, covering models like the Floor One, iFloor, and Pure One series. If your model varies slightly, consult the user manual for specifics.
Step 1: Preparation and Safety Setup
Before diving in, create a safe workspace to avoid slips or water damage.
- Unplug the device: Always disconnect from power to prevent electrical hazards. Warning: Never submerge the base or charging port in water.
- Gather supplies: You’ll need a clean bucket, soft-bristle brush (or an old toothbrush), microfiber cloths, and Tineco cleaning solution. For tough stains, white vinegar works as a natural alternative.
- Empty the tanks: Remove the dirty water tank by pressing the release button (usually on the side). Pour out contents into a drain—avoid sinks if it’s heavily soiled to prevent clogs. Rinse under running water immediately.
This prep takes about 2-3 minutes and prevents cross-contamination. If your Tineco has a full indicator light, empty it proactively to avoid overflows during use.
Step 2: Cleaning the Water Tanks
The clean and dirty water tanks are hotspots for bacteria, so thorough rinsing is essential.
- Clean water tank: Detach it from the base (lift the lid and pull). Rinse with warm soapy water, scrubbing any residue inside. For hard water buildup, soak in a 1:1 vinegar-water solution for 10 minutes, then rinse. Dry completely before refilling to prevent mold.
- Dirty water tank: This one gets grimy fast. Empty as in Step 1, then fill halfway with warm water and a squirt of dish soap. Swish around, let it sit for 5 minutes to loosen debris, and empty. Use a soft brush on the filter screen at the bottom—it’s often overlooked but crucial for suction.
- Reassemble: Ensure seals are dry and click back securely. Test for leaks by filling with a small amount of water.
Expect 5-7 minutes here. Common Complication: If tanks smell musty, run a vinegar cycle (detailed below) and air dry overnight.
Step 3: Cleaning the Brush Roll and Mopping Pad
The brush roll (or roller) picks up most debris, so it’s the heart of your cleaning routine.
- Remove the brush: For most Tineco models, flip the unit over, press the release tabs on the sides, and slide out the roller. If it’s the self-propelled type, it might have a quick-release button.
- Clean the roller: Rinse under lukewarm water to remove hair and dirt. Use scissors to cut away tangled hair (a frequent issue with long pet fur). For deeper clean, soak in soapy water for 10 minutes, then brush between the bristles with a soft tool. Avoid harsh scrubbers to prevent damage.
- Mopping pad maintenance: If your model uses reusable pads, detach and machine-wash on gentle cycle with mild detergent (no fabric softener). For disposable ones, replace after 20-30 uses. Wipe the attachment area on the mop head.
This step takes 10-15 minutes. Testing Tip: After cleaning, spin the roller by hand—it should rotate freely without wobbling.
Step 4: Running the Self-Cleaning Cycle and Exterior Wipe-Down
Tineco’s self-cleaning feature is a game-changer, but manual touch-ups ensure everything shines.
- Self-clean mode: Fill the clean tank with water and a capful of Tineco solution. Place the unit over a drain or tub, press the self-clean button (often a dedicated icon on the display). It runs for 1-2 minutes, flushing the system. Repeat if heavily soiled.
- Exterior and sensors: Wipe the body, wheels, and edge sensors with a damp cloth. For the charging base, vacuum crumbs and wipe with a dry cloth—never wet it.
- Filter check: If your model has an accessible filter (like in the S5), rinse under water and let air dry for 24 hours before reinstalling.
Total time for this phase: 5-10 minutes. Warning: Do not use the self-clean on carpeted areas; always position over hard surfaces or a towel.
Step 5: Drying and Final Inspection
Proper drying prevents moisture-related issues like rust or odors.
- Air dry components: Lay out the tanks, brush, and pad in a well-ventilated area for at least 30 minutes (or until fully dry). Avoid direct sunlight to prevent warping.
- Inspect for issues: Check cords for frays, ensure all parts snap back, and test the unit on a small area. If suction is weak, repeat the brush clean.
With everything dry, your Tineco vacuum mop is ready for storage or immediate use. Full process: 20-45 minutes depending on model.
Warning Signs That Indicate Immediate Cleaning Is Needed

Don’t wait for the schedule—your Tineco will signal when it’s time for a deep clean. Watch for these red flags:
- Reduced suction or streaky mops: Clogged brush or tanks are usually the culprit; clean immediately to avoid straining the motor.
- Unusual odors: A funky smell from the dirty tank means bacterial growth—run a vinegar self-clean and dry thoroughly.
- Error lights or beeps: Models like the Floor One flash warnings for full tanks or dirty sensors; address within the hour.
- Water leaks: Check seals if you notice drips; a quick wipe-down often fixes minor issues, but persistent leaks may need part replacement.
- Slower roller speed: Hair buildup slows it down—snip and rinse ASAP.
Ignoring these can lead to bigger problems, like a $50+ repair bill. Regular how-to clean Tineco vacuum mop habits catch them early.
Pro Tips for Tineco Vacuum Mop Cleaning
Elevate your routine with these expert insights from Tineco support and long-time users:
- Use distilled water: In hard-water areas, it prevents mineral deposits that clog tubes—swap it in for monthly deep cleans.
- Avoid DIY detergents: Harsh chemicals can erode sensors; stick to Tineco’s formula or mild alternatives to maintain warranty.
- Hair prevention hack: For pet owners, attach a mesh screen over the dirty tank inlet to catch fur before it tangles.
- Storage smarts: Keep in a dry, upright position with tanks empty to avoid seal drying out.
- Eco-friendly twist: Reuse rinse water from tanks for plants (after straining)—it’s a sustainable way to clean without waste.
- Common mistake to avoid: Skipping the brush clean after sticky spills (like juice); it leads to permanent residue—always rinse promptly.
- Optimize performance: After cleaning, run a test cycle on a bare floor to recalibrate sensors for better dirt detection.
These tips can cut cleaning time by 20% and boost efficiency, ensuring your Tineco vacuum mop performs like new.
When to Seek Professional Help
While most cleaning is DIY, some issues go beyond basic maintenance. Call a pro if:
- Persistent problems: If suction doesn’t improve after a full clean, it could be a motor issue or internal clog—signs include grinding noises.
- Warranty-covered repairs: Tineco offers 2-year coverage; contact their support (via app or 1-800 number) for free diagnostics.
- Choosing a provider: Look for authorized Tineco service centers (find via their website) with certified techs. Read reviews on sites like Yelp for quick turnaround.
- Cost ranges: Basic cleanouts run $50-100; full repairs (e.g., brush replacement) $100-200. Factor in shipping if not local.
If your model is under warranty, DIY fixes might void it—err on the side of professional help for complex woes.
FAQ
Q: How do I clean the brush roll on a Tineco Floor One S3?
A: Flip the unit, press the side tabs to release the roller, rinse under water, and brush out debris. Soak in soapy water for tough spots, then air dry. It takes about 10 minutes and should be done weekly.
Q: Can I put Tineco vacuum mop parts in the dishwasher?
A: No, most parts like tanks and brushes aren’t dishwasher-safe due to plastic warping. Hand-wash with mild soap instead to preserve integrity.
Q: What if my Tineco vacuum mop smells bad after cleaning?
A: Run a self-clean with a vinegar-water mix (1:1 ratio) and let everything air dry for 24 hours. If it persists, check for hidden mold in the tanks—deep clean or contact support.
Q: How often should I replace the brush roll on my Tineco?
A: Every 3-6 months with regular use, or sooner if bristles are worn. Tineco sells replacements for $20-40; check for uneven wear during monthly inspections.
Q: Is it safe to use bleach to clean my Tineco vacuum mop?
A: Avoid bleach—it can corrode parts and damage sensors. Opt for Tineco solution or vinegar for safe, effective sanitizing.
Q: Why is my Tineco not self-cleaning properly?
A: Ensure the clean tank is filled correctly and the unit is on a flat, hard surface. If the pump whirs but no water flows, clean the inlet tubes manually.
Q: Can I clean the Tineco charging base?
A: Yes, unplug it, vacuum debris, and wipe with a dry cloth. Avoid water near electrical components to prevent shorts.
Keep Your Tineco Vacuum Mop Running Smoothly
With this 2025 guide on how to clean your Tineco vacuum mop, you’re equipped to handle everything from quick rinses to deep maintenance:
- Essential prep and tank cleaning for daily hygiene
- Brush and roller care to maintain suction
- Self-clean cycles and pro tips for long-term performance
- Schedules and warnings to stay ahead of issues
Following these steps will keep your floors spotless and your device reliable, saving you time and hassle. Don’t wait for a breakdown—incorporate this routine today and enjoy effortless cleaning.
Tried this Tineco vacuum mop cleaning method? Share your tips or challenges in the comments below to help fellow users! If odors linger, describe your setup for more tailored advice.